
In the last moments of my crazy deadlines, I found a new form of procrastination. Basically, I began obsessing on indie sewing patterns.
I love the premise that the pattern is a tool for learning proper garment construction AND a canvas for personal expression.
Another thing I really like about these patterns is that women around the world are making and posting their versions online. I could literally look at dozens of versions before making mine. As well, as read comments about how the pattern worked for them.
My first foray into the indie pattern world was a safe bet–The Laurel. It is a very popular pattern by Colette Patterns.
 First, I traced my pattern size onto pattern paper. Pattern paper is very stable and allows you to pin and pin the pattern into infinity.
 One of the first things I noticed about the pattern was the quality of the tissue paper. You could never get a McCall’s pattern to fold back up like this.
 I made my muslin. This is a new and good thing for me.
 I discovered that I am one size on top and another on the bottom. I went back to my traced pattern and corrected this–blending the two sizes. I also significantly shortened the garment. The pattern finishes at 33 3/4 inches, while my finished garment is 29 1/2 inches.
I thought I would use a really nice wool I had purchased to make a blanket for the entire tunic, but once I started cutting I realized that was kind of boring.
I remembered I have an entire tub of vintage kimono scraps. Why do I have an entire tub? Well, I think it is because in the last week of February in 2014, I would decide to make a Laurel tunic.
 This bit of fabric was perfect.
 I love the hand marked Japanese. I almost put it on the outside of the garment.
 I dug some more and found this scrap to use for the cuffs and the bias tape for the neckline.

 This was my final palette.
 And my final garment.
 I did not put a zipper in. I never use them in real life.
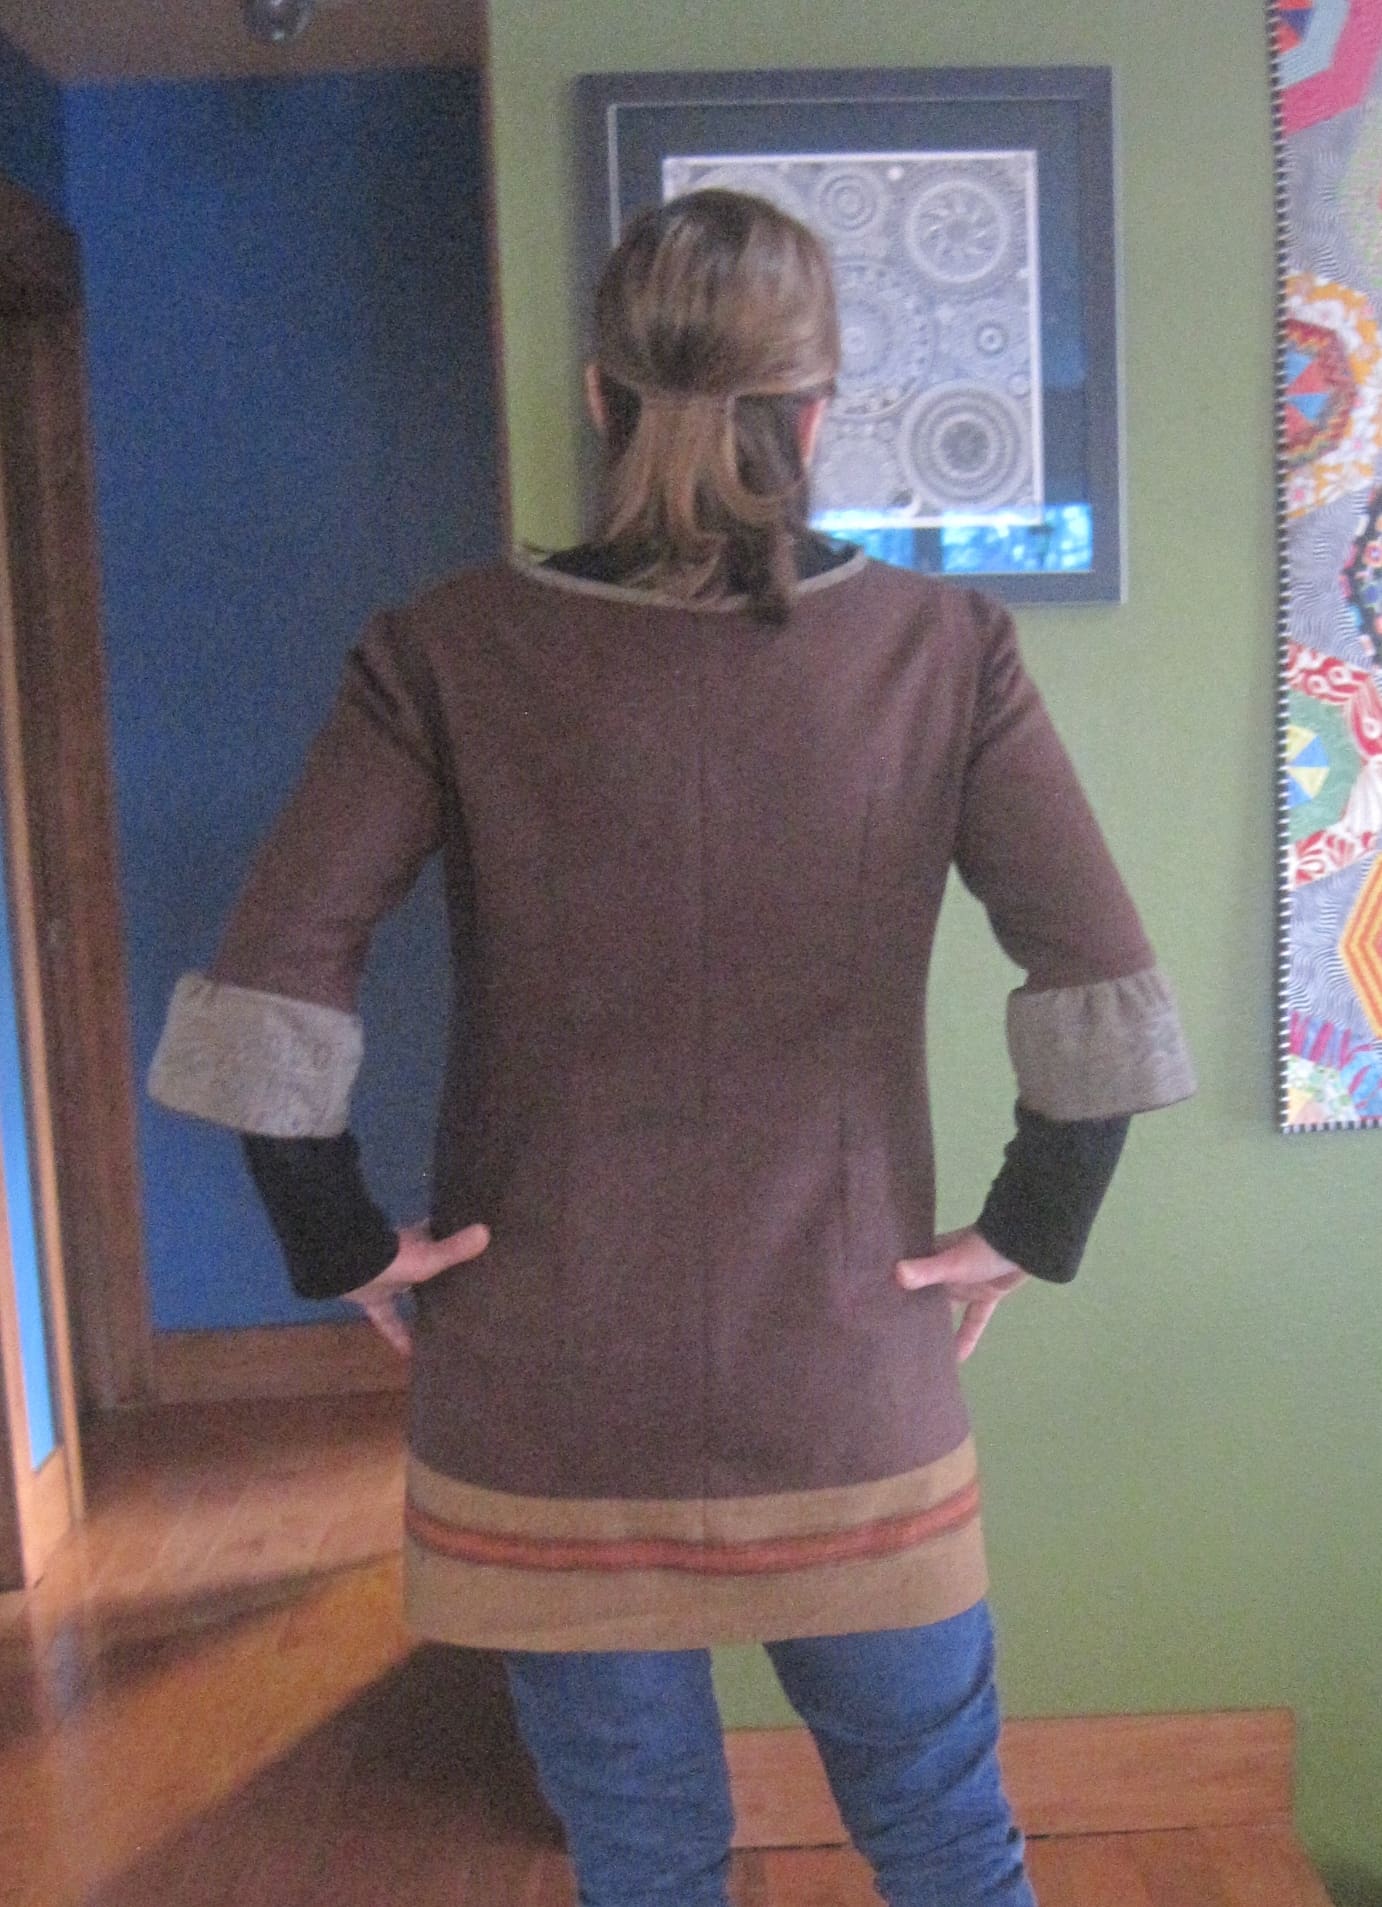 I layered a cotton long sleeve t-shirt underneath.
 I am looking forward to making this again as a blouse with a wild vintage flower power print.
 I wore it to the Anchorage Performing Arts Center this week to see David Sedaris. It was the perfect amount of warmth. I think I like it.
 Next, I’m trying to get up my nerve to explore knits. Does anyone have any helpful hints on dealing with stretchiness?

I’ve just started following your blog via Feedly. Great inspiration all round-I’ve just moved countries and I can’t wait to get my sewing all set up! Even feeling almost brave enough to have another go at garment sewing…!
Thank you Camilla for you nice comments. Get your machine set up! You will be sew glad you did it.
Nice!
Thank you Sue!
I’ve covered all the internet in learning to deal with knits, I ended up with a small zig zag. I’m not sure I like the finished look of the twin needle stitch. I tend to practice on the fabric I’m going to sew on, with walking foot on and then off. It seems like every one is different. Pressure has to be alot more without the walking foot!
Jo- I followed your advice with some lovely fleece I bought at Seams Like Home. Thank you! I also found these tutorials by Made by Rae to be helpful. I am not sure that I am ready for t-shirt knits just yet, but I am inching my way in that direction.
You’re so clever, Maria! Stretchiness calls for underlining in a very lightweight fabric like cotton batiste or cotton lawn.
Thank you Sandy. I have so much to learn about garment sewing!
Wonderful!
Thank you Denny.
When I’m cutting knits, I use pattern weights (aka tuna cans) to keep the fabric from slipping off the table while I’m pinning and cutting. When I sew seams and hems, I use a narrow zig zag stitch to allow for stretch in the fabric without breaking the thread. Make sure your fabric has the required amount of stretch for the pattern! There is usually a guide on the pattern envelope that allows you to test how much stretch you need. Go for it and have fun!
Tuna cans! Brilliant. They are the perfect size.
Check out this series
http://dixiediy.blogspot.com/2011/12/never-fear-knits-part-1.html?m=1
Thank you Denny for the great tip!
I speculated at David Sedaris that you made your top that morning. Loved it. I’ve been watching a Craftsy series on sewing with knits. Informative, but a little slow.
I have thought about watching that too. Some of the reviewers have said the same thing–informative but slow. I just need to over come my fear of my serger!
Looks great! It is a nice length. Good idea with the muslin.
Thank you Mary! I hope your quilting adventure was a good one.
Pingback: Project Everyday Update #1 | Maria Shell